Wooden hull care and maintenance
It is important to ensure the essential hull maintenance of a wooden boat is done, even if you are paying others to look after your boat for you. The priority is to prevent rot from taking hold. The protective layers of paint and varnish over wood are far more critical than on GRP boats, where the topsides are painted more for cosmetic reasons.
One of the fundamental things to understand is the nature of wood itself. If wood becomes soaking wet, it swells. As it dries, it shrinks. The proper care of a wooden hull is down to keeping a balance between the cycle of wet (i.e. afloat) and dry (i.e. ashore) periods. Dry weather dries out wood causing it to shrink. Salt water is good for wood as it not only protects the wood from fungus but also moistens the wood which stops it from shrinking.

Wooden hull inspection
- Check the condition of the paintwork. If there is any cracking of the paint along the grain of the wood then this indicates there might be rot developing beneath. To be sure, cracks need to be scraped out to check for rot.
- To check for rot, tap along the hull using a small wooden mallet, or the wooden handle of a tool will do. Listen out for the sounds the tapping makes. A high, metallic or slight ringing sound indicates the planking is in good condition. If there is a dull, soft sound, this indicates there is rot. Mark the area and if in doubt have it checked thoroughly by a surveyor. Note the tapping will sound different as you pass over the ribs.
- If the timbers themselves show signs of splitting along the grain then this indicates the hull has dried out.
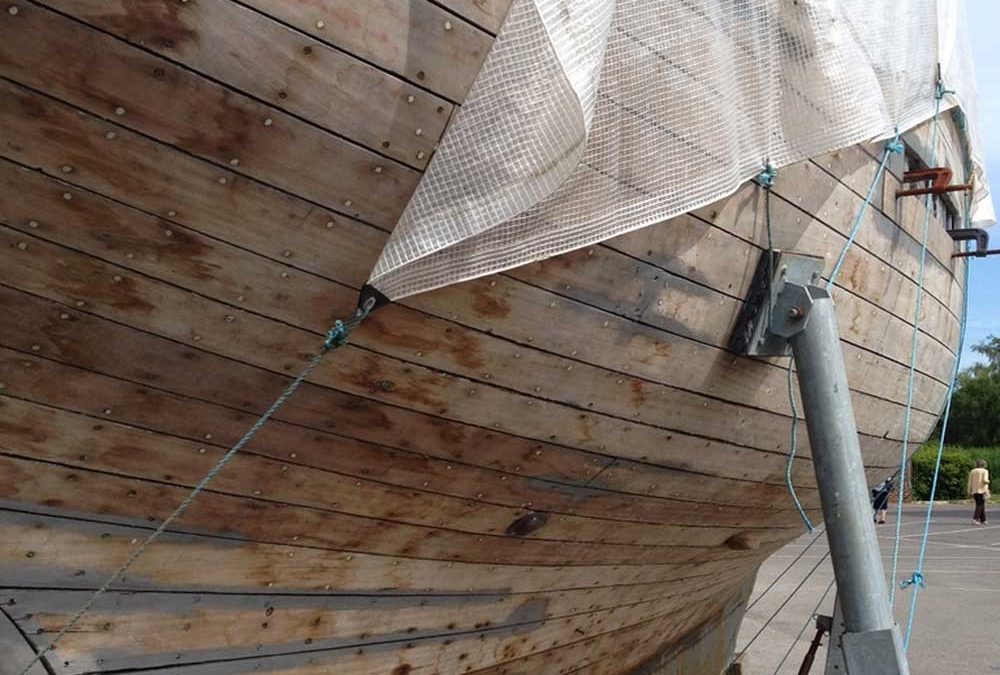
- Check the plank edges and seams are in good condition. If these are proud in places then this can indicate the planking has moved.
- Check the caulking is in good condition and remains well bedded in the seams.
- Inspect the plank fastenings for signs of corrosion – green coloured stains indicate corrosion of copper fastenings, rust stains indicate corrosion of steel fastenings and white stains indicate corrosion of galvanised fastenings.
- Pay particular attention to the fastenings where the planks attach to the transom. Also check for splits in the ends of the planking where it joins the transom.
- Likewise, check the fastenings of the planking at the stem. This is where the planking is under considerable stress.
- Make sure none of the frame ribs are broken, especially near the tops where most damage can occur.
- Check there is no gap or signs of corrosion along the joint between the keel and the hull.
- Check the keel band of motor boats is in good condition.
- Check the keel bolts are in good condition.
If your boat passes the hull inspection with flying colours, then the care and maintenance of the hull when it is hauled out entails the following:
- Fitting a cover that comes down to the waterline.
- Priming any bare timber that may have been exposed by the pressure washer.
- Rubbing down the topsides, patching with undercoat as necessary, applying topcoat as required.
- Below the waterline, rubbing back, patching undercoat where required and then applying antifouling.

Hull stripping
For wooden hulls, the two main methods to consider for removing paint are either using a chemical paint stripper or a heat gun. The heat gun is generally recommended as it will be cheaper and less messy to use.
These are the steps involved in stripping the paint from a wooden hull:
- Heat gun – use a heat shrink gun and a putty knife to scrape the old paint layers off. Take special care not to scorch the wood. If you have not used a heat gun before then practice on some scrap of painted wood, an old painted wooden door for example, until you are confident you can work the machine correctly. Wet the bare wood using salt water to make a wet barrier to protect it from the heat gun.
- Electric plane – when you have removed as much paint as possible with the heat gun and putty knife, use an electric planer to take off any remaining paint, being careful only to remove a tiny bit of the wood if necessary at the same time. Again, practice using this machine before diving into planing your hull.
- Rotary sander – go over the surface of the wood with 40 grit paper using a rotary sander at low speed. Keep the sander flat against the hull with an even pressure, moving at all times in order not to leave sanding marks. Never stop the machine when it is against the wood as it will leave a nasty mark.