Select Page

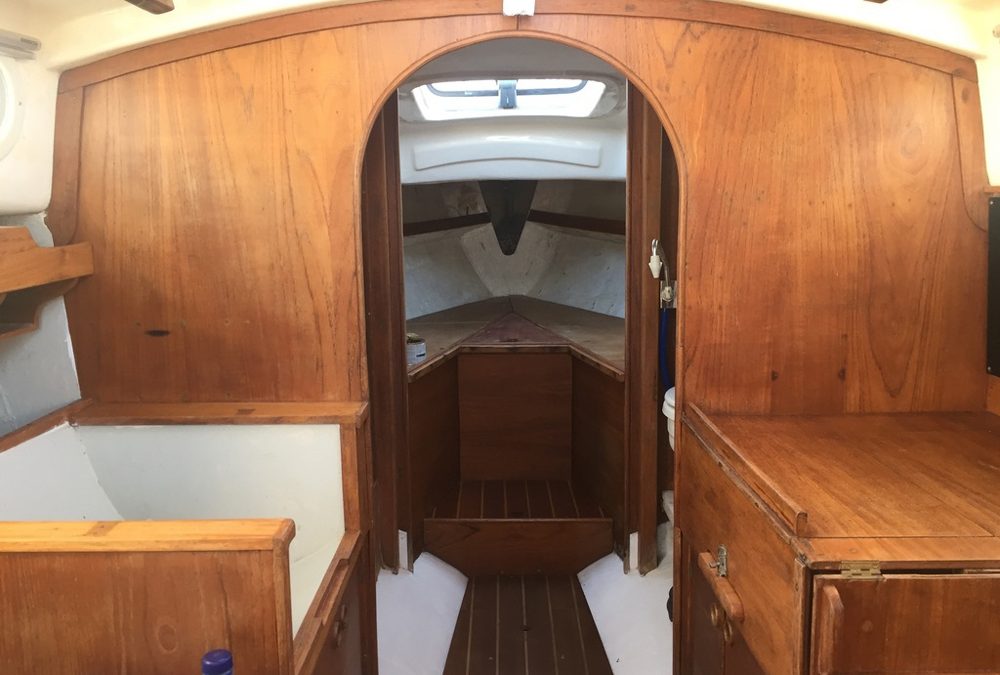
Boat interiors on the whole are pretty resilient but over time bulkheads, doors, the cabin sole and surfaces become scuffed, stained and suffer general wear and tear due to the marine environment.

In an ideal world, the best location to undertake such a project is inside a heated boat shed, well protected from the winter weather and with access to power for decent lighting. Unfortunately this was not my recent experience two winters ago, with the boat exposed to the elements and no access to power, but with perseverance I nonetheless achieved some satisfactory results.

boat interior varnishing

Most boat interiors have a combination of varnished and painted surfaces including solid wooden joinery, plywood laminates with thin hardwood veneers and glass reinforced plastic. When making your assessment of what you are going to do, bear in mind that the varnishing process consumes a lot of time, especially if the existing surfaces are in poor shape. This is because, in order to do a decent job, the preparation takes much longer than the brush work itself.

boat interior varnishing

Preparation

Stripping and refinishing interior woodwork is best approached with some caution. Veneered surfaces are usually very thin and it is possible to sand right through a veneer.

  • Cleaning – start by cleaning surfaces with a mild bleach such as a hydrogen peroxide and water solution to remove any traces of mould. Baking soda is good for removing oil and grease and a Scotch Brite type pad soaked in ammonia works well. Bleached and darkened timber can be restored with oxalic acid in order to achieve a uniform timber surface. Trial and error works best as it all depends on the actual state of the surfaces and whether the wood has been treated with varnish or oil over the years. Solid teak will often have been treated with oil, while a veneer will more likely to have been varnished. Allow everything to dry before sanding.
  • Stripping – if areas of old varnish are cracked and flaking, this will need to be scraped off using a paint scraper. Care needs to be taken not to damage the wood so a plastic scraper is preferable to a stainless steel one – either way proceed with caution. The decision then is whether to use a chemical stripper or proceed to sanding. Rightly or wrongly I chose to use a gel type paint stripper and although this proved a slow, messy process in the end it worked out fine. I wore rubber gloves and a breathing mask to be on the safe side.
  • Filling – some of the bulkheads on my boat had had screw holes drilled into them in the past, presumably for securing instruments, fittings or shelving. I filled these with a teak coloured wood filler before sanding.
  • Sanding – some people just launch straight in with the sanding which may be fine with timber in good condition, but for those who have been cleaning, stripping and filling you are about halfway through the process. Somewhere between an 80-320 grit aluminium oxide paper is recommended for sanding, depending on the surface condition. It is best to use a sanding block to get an even finish and to finish with a 320 grit paper. Remember to sand along the grain of the wood to avoid scratches showing through the varnish. Once satisfied with the finish, some hours or even days later, remove all sanding dust, which is easier said than done in a confined space. This will most likely entail removing overalls and giving them a good shake outside.
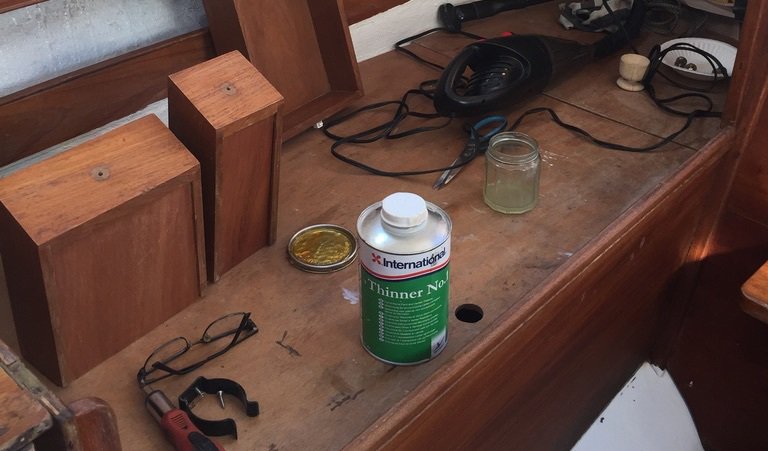
  • Thinners – back inside and with dust removed, now brush the sanded surfaces with thinners and wipe with a clean soft cloth. This will remove traces of dust and also any oil residue on the surface of the wood.

boat interior varnishing

Varnishing

  • Preparing the varnish – I chose International’s Goldspar Satin varnish, which is recommended for interior use. This can be thinned if necessary using thinners and is easy to apply. Good quality brushes are a must with at least two sizes – for fine work and larger areas. Decant the varnish into an old jam jar and seal the lid of the tin to prevent any dust from getting in.
  • Application – when applying varnish on a vertical surface such as a door, brush in a vertical direction. For the first coat, thin the varnish a little as recommended on the instructions label on the tin. Work quickly in a controlled manner, taking care not leave a build up of varnish along the edges. Once you have worked over an area do not be tempted to brush over it again until it is completely dry. If there are any imperfections you notice these are best left until the varnish is dry. Only then can you sand the edges back before applying another coat. Be prepared to apply several coats of varnish to get a good finish, sanding in between coats with 220-320 grit wet and dry paper. Much depends on how much of a perfectionist you are.

boat interior varnishing

Interior painting

If you have invested considerable time and effort varnishing your boat’s interior, then set aside a little extra time to paint the bilges, lockers, galley and heads with a fresh coat of paint. I recommend Danboline bilge paint for this, which is tough, durable and finishes to a thick, hard wearing gloss. After all that varnishing, doing this is a piece of cake by comparison and almost as rewarding as the varnishing.

You Need To Understand The IRPCS ColRegs To Pass Your Yachtmaster, Master of Yachts and Coxswain Certificate of Competence

IRPCS ColRegs Rules of the Road at Sea and Yachtmaster Learning, understanding and remembering the International Regulations...

Sector lights, directional lights, leading lights – how do they differ?

Sector lights, directional lights and leading lights guide vessels safely through hazardous waters or narrow channels at...

The give-way hierarchy at sea – who gives way to whom?

Whatever their size or type, all skippers have a responsibility to avoid collisions with other boats at sea.  It is...

Cleaning & polishing painted topsides

The gelcoat topsides of a GRP boat can be pampered and restored to their former glory relatively easily when it is ashore. Gelcoat is only a very thin outer layer of the hull, often less than 1mm thick, so you should avoid cleaning it with highly abrasive cleaners, or an-ything that could potentially damage its surface.

Liferafts

Liferafts should be stowed where they are ready for immediate launching. All crew should know the location of the liferaft and know how to launch, inflate and board it. They should also know what equipment it contains.

Safety Equipment Checklist for Boats

Safety Equipment Checklist for Boats   Liferaft line attached The liferaft will not work unless the trigger line is...

Rudders and steering systems – Part 1

Rudders and steering systems. A rudder is one of the most critical parts of a boat. Rudder failure is a common occurrence on neglected or overworked boats and a very unpleasant and potentially dangerous thing to happen when you are out at sea.

Boat engine basics

Boat engines come in all shapes and sizes and include inboards, outboards, petrol, diesel, electric and hybrid systems. Some engines are...

Capsize – understanding the risks

A skipper should know how their boat will cope with rough seas. By working within known limits and understanding the risks,...

Avoiding personal dangers at sea

In order to stay safe at sea, we need to know the risks we are facing and to be aware of any personal dangers we could possibly encounter. Here are six of the most common potential dangers individual crew members should be aware of.

Marine diesel exhaust checks

You should inspect the exhaust system for corrosion damage regularly, especially around the injection bend. If you have noticed the engine exhaust smoking a lot during the sailing season this can also indicate a number of potential problems.

Boat ownership

Owning a boat is a big commitment that should bring no end of satisfaction for the owner as well as the owner's family and friends. In...

Jester Challenge 2022 – Sailing single handed from Plymouth UK to the Azores: Part 10 – The Return Trip

Jester Challenge – A modern experiment in old-fashioned self-reliance, self sufficiency, and personal responsibility. This is the final instalment of a 10-part post where solo sailor, Bernie Branfield, shares his first-hand account of his single-handed, 2022 Jester Challenge, from Plymouth, UK to the Azores, in his 26′ Invicta Mk2, Louisa.

Anchoring – getting it right

If you can set an anchor correctly with confidence and know your boat will be safe in a secure anchorage, then you can rest in comfort and will not...

Sailing at the touch of a button

Easier and more controlled sail handling can also be achieved by powering up a furling mast. I came across some interesting solutions at the Southampton Boat Show this week on the Selden Mast stand, where they were running demos of their E40i electric winch and SMF furling system.

Tools and spares for your boat

Tools and Spares to take to sea!

You won’t regret taking a look at our essential tips and checklist to make sure you’re prepared for routine maintenance and those unexpected jobs that come up whilst you’re afloat!

Essential Boat Spares for Safety

  Boats Spares Tool kit What you carry in the boats tool kit will be useful for many boat repairs, but you might want...

Five dangers a vessel may encounter at sea

What are the main dangers a vessel may face at sea and what should skippers do to reduce the risk of these happening?

Boat engine cooling systems

Some boat engine breakdowns are unavoidable but those caused by lack of maintenance or regular checks can be avoided. Failure to maintain an engine’s cooling system is a well known example of this, so it is well worth spending time checking over the cooling system both when the boat is ashore and afloat.

Antifouling for leisure boats – Part 4

Applying antifouling. Antifouling is best applied on a dry, calm day. It is best to apply the antifouling in the middle of the day to ensure the hull is dry and as warm as possible.

How to use tides and currents to your advantage

If you are contemplating a cruise through tidal waters and strong currents, then planning your trip carefully in advance is essential to enable you to take advantage of favourable tides rather than constantly fighting against them.

How to Avoid Collisions At Sea With The ColRegs

      Every Skipper Needs Accurate Knowledge of the IRPCS ColRegs As a responsible skipper it is every skipper’s duty to learn and apply the IRPCS...

Essential boat engine checklist

Boat engine checklist Engine oil level check Even if you have checked it previously, confirming the engine oil level is up...

How to operate a winch

Winches are drum shaped mechanical devices used to handle halyards, sheets and control lines. One of the important crew...

Stern gear maintenance

The stern gear of a boat needs to be checked carefully when the boat is ashore as this is something that can only be done when it is out of the water. The same applies for any maintenance and repairs that may need doing, so it is best to check it all over as soon after an end of season lift out as possible.