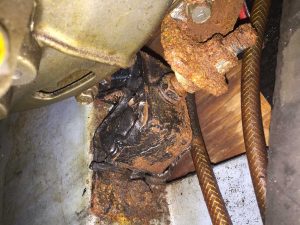
Maintaining a boat can be a rewarding experience but at times it can also be frustrating. A prime example of this is when you come across a seized fixing or fastening that refuses to budge.
Before you damage a screw head or bolt slot of a fixing that refuses to move, tell yourself that patience will be rewarded. Be wary of power drivers – in my experience these can easily strip screw heads of seized or corroded fastenings. Here are some tips:
- Penetrating fluid – start by applying a good quality penetrating fluid such as WD40 and leave it for at least 15 minutes and longer if necessary. Do not expect this to work instantly. Covering the fastening with clingfilm will prevent evaporation of the fluid.
- White vinegar – white vinegar is good for freeing things up, especially if a fitting has been exposed to saltwater. Vinegar is especially effective at freeing up seized aluminium fittings where corrosion may have set in. Allow white vinegar plenty of time to work.
- Tapping the screw head with a hammer – the vibration this causes can free up a corroded fastening. The best way to do this is to place a tightly fitting screwdriver (or box spanner over a bolt), hold it tight, turning it in the right direction and then tap the back of the screwdriver.
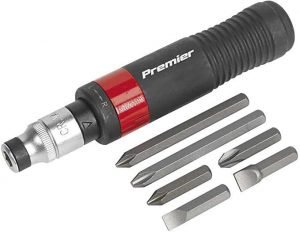
- Impact driver – impact drivers are specifically designed to undo screws that are stuck fast. They take a bit of practice to use but they are effective. It is important to use the right sized bits for it to work properly. Then it is a matter of holding the handle of the driver firmly with a little turning pressure applied and tapping the end with a hammer. Little by little the screw should begin to move.
- Locking pliers – pliers, vice grips, mole grips and long nose locking pliers can sometimes be more effective than a screwdriver, provided you can get a good grip on the screw head.
- Friction enhancer – this is a type of fluid mixed with metallic particles that help tools get a better grip on a seized fastening. Alternatives include using steel wool or rubber bands placed over the screw head to help the screwdriver grip more effectively. Try this in combination with pliers to get more torque.
- Heating and cooling – for obvious reasons go carefully here. There are products that can freeze a bolt, causing it to contract, which is probably a better option than setting fire to your boat. If it is safe to do so, heating a nut is best rather than the bolt itself, using a propane torch.
- Drilling – the last resort is to drill out the old fixing. This entails filing the fastener flat if possible and then drilling a pilot hole before resorting to a larger drill bit. It is best to use a left hand twist drill bit as this will turn in the direction that fastenings are removed. If this does not work completely then there are specialist extractor tools available which may be worth looking into.
Removing fittings sealed with polyurethane
There can be one last hurdle. If the fitting was originally bedded with polyurethane then the fitting may well be stuck fast, even if you have managed to extricate the fastenings. There is a risk that your soul could be almost destroyed at this point, but remind yourself that perseverance wins through in the end:
- There may be a way to cut through the polyurethane bond, if the sealant is thick enough and you can reach around the fitting. A cheese wire type wire saw can work, allowing you to saw through the seal. Maybe.
- Another option is to try separating the fixing by driving a chisel under one edge and then leaving it for a few hours. This can stretch the old sealant little by little and is known to work.
- There are chemical products that can work, including DeBond Marine Formula. This is expensive but by now you won’t mind. Most reviews of this product are 5 star. It says on the tin “This Stuff Really Works”.
- Heat can work but you don’t want to risk melting the deck or setting fire to it.
Re-bedding fixings
The next stage is to apply new sealant and re-bed the fitting. It is probably best to avoid using polyurethane sealant as this will create a permanent bond that will be almost impossible to remove in the future.
With the fastenings and fitting removed, remove any old sealant or bedding material, clean up the area with acetone and then dry it thoroughly.
- Mask the area around the fitting to prevent any excess sealant from making a mess of the deck. Mask right up to the edge of the fitting, tracing around it if necessary before applying the sealant.
- Apply the sealant evenly to both surfaces of the fitting. I use an old artist’s palette knife to do this which is very effective – the main thing to watch out for here is to keep the sealant even and smooth and avoid getting into a mess.
- Place the fitting carefully into position. Add a little sealant to the underside of the mounting bolts or screws.
- Assemble the fastenings until they are finger tight, enough for the sealant to begin to bulge slightly around the fitting.
- Wait until the sealant is cured before tightening the fastenings to ensure a good fit.
- Lastly trim any excess sealant that has bled out around the fitting, using a thin, sharp blade.


